☑️ Post a Single Line Charge (Invoice) or Credit in ParcVu Desktop
Last updated 6 months ago
To access this function the user will need the Allow Ledgers sub-menu permission
Post Single Line Charge can be used to post a single charge/credit to a single account
From the Home screen, to to Ledgers Sub Menu > Post Single Line Charge/Credit
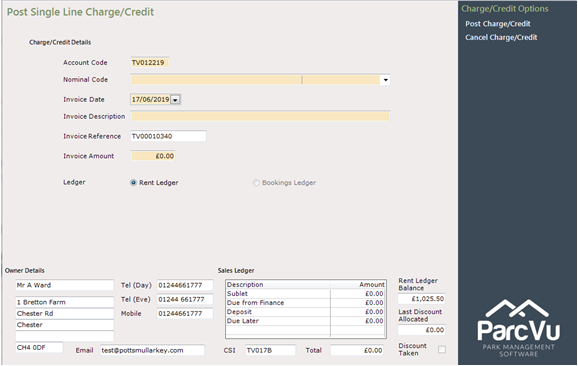
A Park must be selected in the top right corner of the screen - this option will be greyed out if set to All Parks
Select ‘New Charge/Credit’ from the navigation list at the top right of the screen and the required fields will be livened up to enable you to enter the information.

Enter the required Account Number into the ‘Account Code’ field. If you need to search for the Account Number, enter the first letter of the Park Code into the field and hit the ‘Tab’ key on your keyboard. A message will be displayed, offering a search facility, click ‘Yes’.
The ‘Find Account’ screen will be displayed, use one of the search fields and click find>>
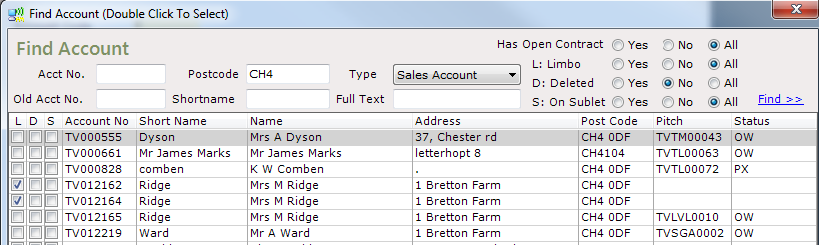
From the list displayed, double click on the required Account and the Account Number will be automatically input into the ‘Post Charge/Credit’ screen. (The Account details and current Rent Ledger balance will also be shown at the bottom of the screen).
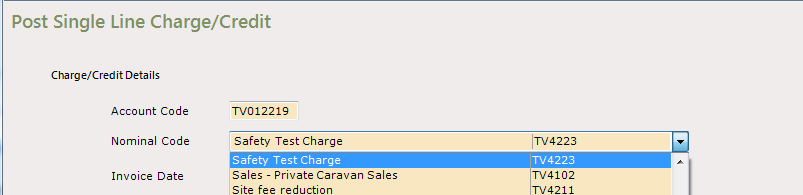
In the ‘Nominal Code’ field, use the Drop-Down list facility to select the correct area to be Charged/Credited
If the nominal code is not available to select, your Internal ParcVu Administrator will need to make that nominal available for Manual Invoicing. For more information on amending nominal codes, see the article Amending Nominal Codes in ParcVu Desktop
Today’s Date will be automatically selected in the ‘Invoice Date’ field, use the Drop-Down list arrow to view the Calendar if required.
Click into the ‘Invoice Description’ field and the selected Nominal Code description will be automatically entered, click next to this and a note can then be manually added if required.
In the ‘Invoice Amount’ field, click into the amount showing to highlight it, then, enter the required amount for this invoice.
To post a credit, enter a minus (-) before the amount
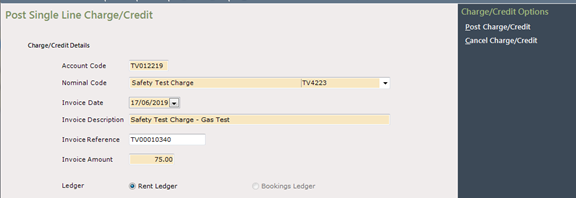
Once completed, Select ’Post Charge/Credit’ from the navigation list at the top right of the screen. Confirm whether you wish to print the Invoice.
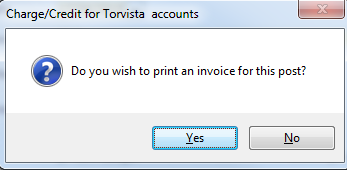
Select the required Printer to print the Invoice to.
A message will appear showing that the Charge/Credit has been ‘Posted’.
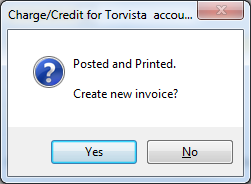
Confirm whether you wish to create another. If you select ‘Yes’ the previous Account number will be retained for you to create another invoice.
If you want to create an Invoice for a different Account, select
‘Cancel Charge/Credit’ from the navigation list at the top right of the screen and the Ledgers menu will be displayed.
When finished, click on the tab at the top of the screen to return to the Main Menu.
