☑️ New Customer Part Exchange in ParcVu Desktop
Last updated 6 months ago
Creating the Part Exchange Unit
If a New Customer wishes to buy a Holiday Home at your Park, but wants to offer their existing Holiday Home in part exchange (in this case, the existing unit could be a tourer or a Static at a Park owned by another operator), the user will need to create the existing unit before proceeding with the sale.
See Create a Van in Limbo for instructions on how to create the existing Holiday Home
When a Limbo Van is created for this purpose, no costs need to be entered. The van should remain in limbo until it arrives on your Park, so that ParcVu reflects reality
Creating the New Customer Part Exchange Sale from A Pitch
From the Main Menu, select ‘Pitch’, use any of the available options to locate the Pitch that has the Holiday Home the customer wants to purchase
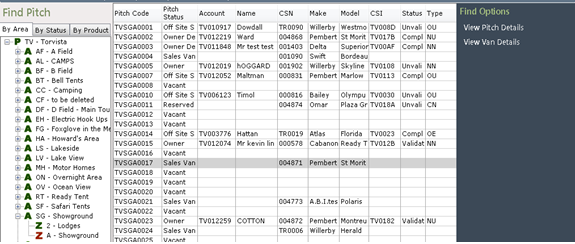
Double click on the required Pitch in the grid and the ‘Pitch Details’ screen will be displayed.
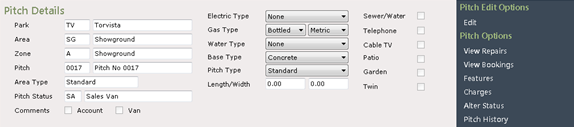
Select ‘Alter Status’ from the Navigation list on the right
Next select ‘OW’ Owner, from the options list
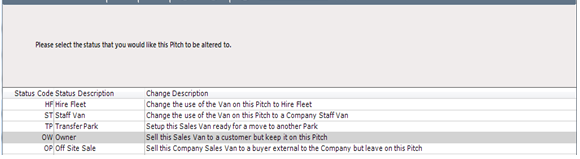

Click at the bottom of the screen.
Creating the New Customer Part Exchange Sale from A Holiday Home
Navigate to the Van Details screen of a Sales Unit, and select Sell Van

Creating or Selecting the Account
If you don’t think the customer has an Account already, select ‘Generate a new account’. Select ‘Use an existing account’ for a person whose details may already be in the system, for example: an ex owner, or a customer with a previous Cancelled Sale etc.

Then click ‘Next’.
Or, select for a person whose details may already be in the system, for example: an ex owner, or a customer with a previous Cancelled Sale etc., then click

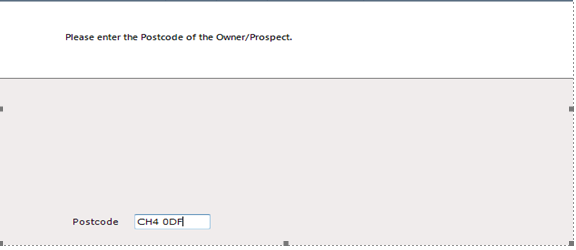
If ‘Generating a New Account’
Enter the postcode then click ‘next’ at the bottom of the screen.
The system will return details of existing people of the Post Code entered
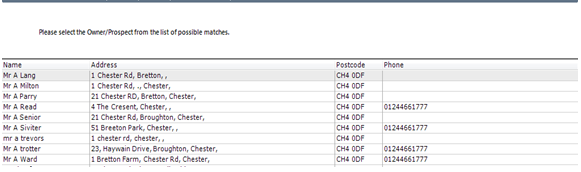

To create a New Account for the customer, click at the bottom of the screen
If the customer details aren’t in the list, leave the Not in List box checked and click Next - this will create a new blank account details page for you to fill in
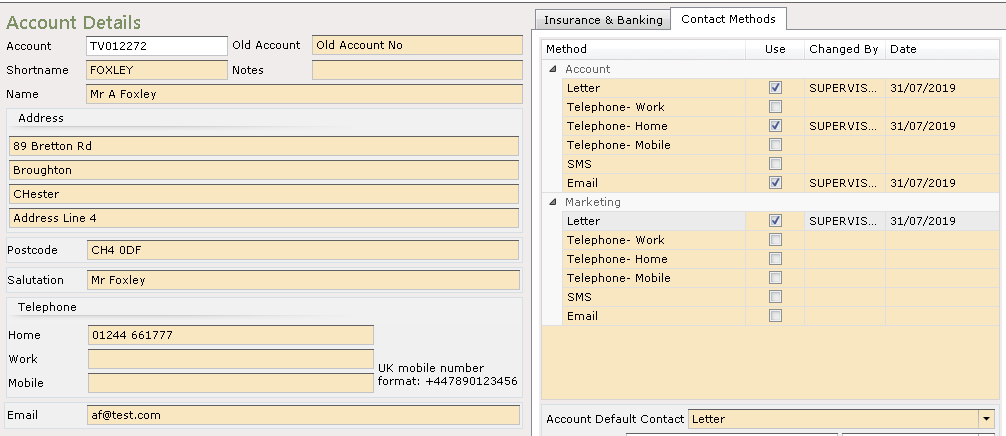
The system will automatically generate an ‘Account Number’ for the ‘New Owner’.
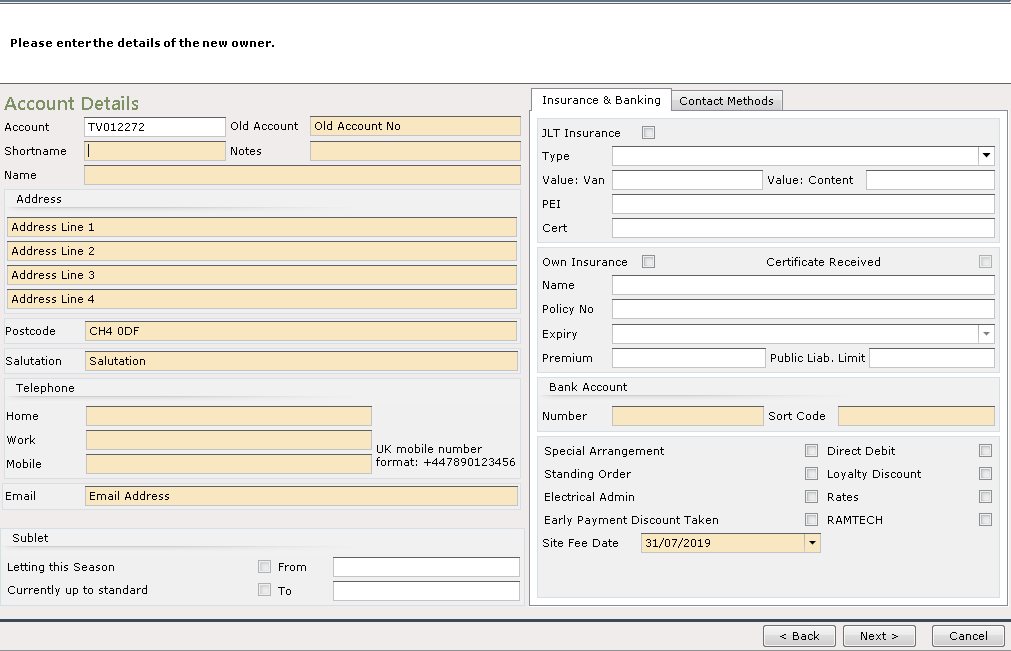
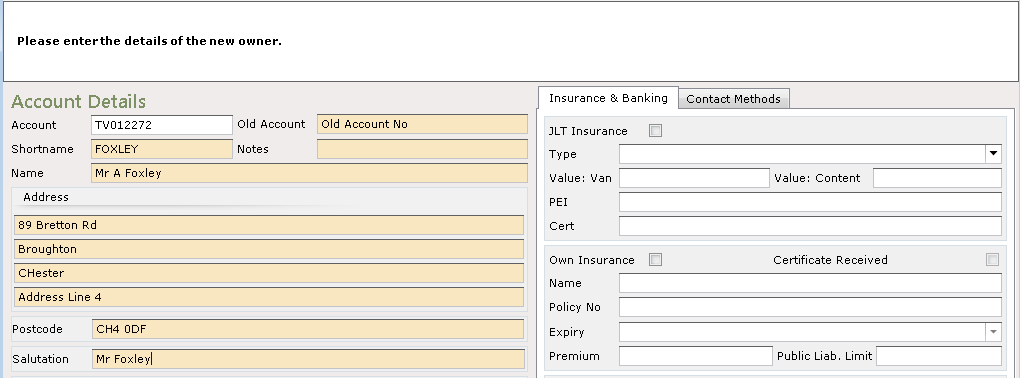
Enter a three letter ‘Short name’, (use the specified Company format for this).
Complete all the highlighted fields re: Name & Address details.
In the field marked ‘Salutation’, you need to enter the name in the way you would like it to appear on correspondence, after the word ‘Dear’ i.e. if the Customers name is Mr A Smith, the ‘Salutation’ field should be entered as either just ‘Mr Smith’ or maybe their first name if preferred.
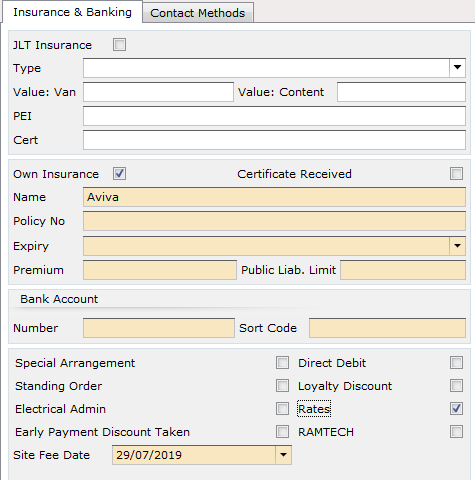
IF known, click into one of the ‘Insurance’ boxes to confirm whether the customer is taking Company insurance or has their own, complete all available Insurance details.
Click into the boxes to ‘Tick and Flag’, the relevant account information on, ‘Loyalty Discount’, Rates etc. The ‘Site Fee Date’ will be the date of the Sale and should not be changed.

Click onto the ‘Contact Methods’ Tab
Click into the ‘Contact Method’ types for this customer, for Both Account contact and Marketing contact as appropriate
To choose a Contact Method, you must have the relevant information on the Account - for example, to select marketing by Email, the Account must have an email address entered
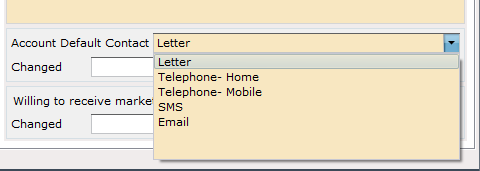
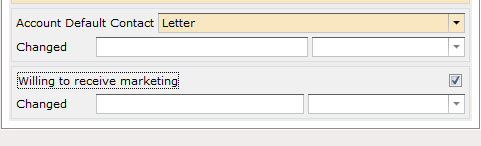
Select the ‘preferred’ contact method from the Drop-down list.
If the customer confirms they are willing to receive marketing, set the flag for ‘Willing to receive Marketing’ by clicking into it to ‘tick’ it, otherwise leave this field blank.

When finished, click this will then show the ‘Sales Details’ screen.
If selecting an ‘Existing (Limbo) Account’
Select Radio Button marked ‘Use an existing (limbo) Account’ for a person whose details may already be in the system (i.e. ex owner, previous cancelled sale etc) then click ‘next’

Find the ‘Existing limbo Account’ using the search facilities displayed
i.e. Postcode, Short name etc, click find>>.
Click on the required details from the list displayed to highlight them and Un-tick the ‘Not in the list’ box at the bottom of the screen

Click . The Owners details will now be displayed, check all details are still correct and amend where necessary. Click into one of the ‘Insurance’ boxes to confirm whether customer is taking Company insurance or has their own, complete all relevant Insurance details. Check and amend the ‘Ticks and Flags’ boxes for ‘Loyalty Discount & Rates. The ‘Site Fee Date’ should be the date of the Sale.

When finished, click this will take you to the ‘Sales Details’ screen
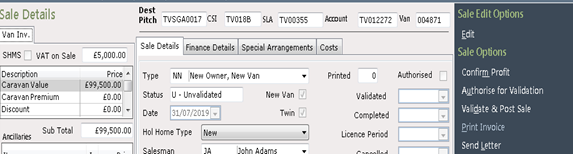
Sale Details
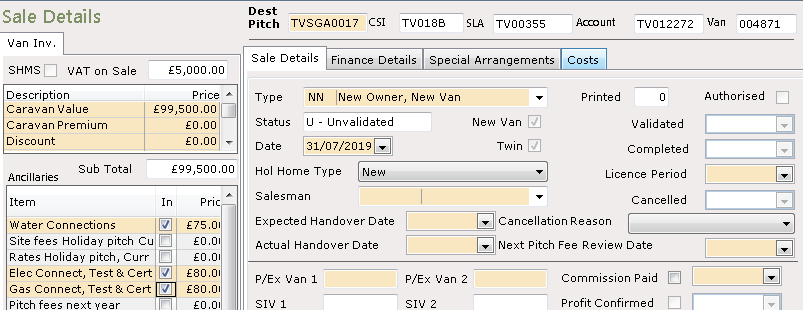
The ‘Sales Detail’ screen shows across the top for this sale the CSI - Caravan Sales invoice number, SLA - Sales License Agreement Number, Account - Account Number and Van - Van CSN Number
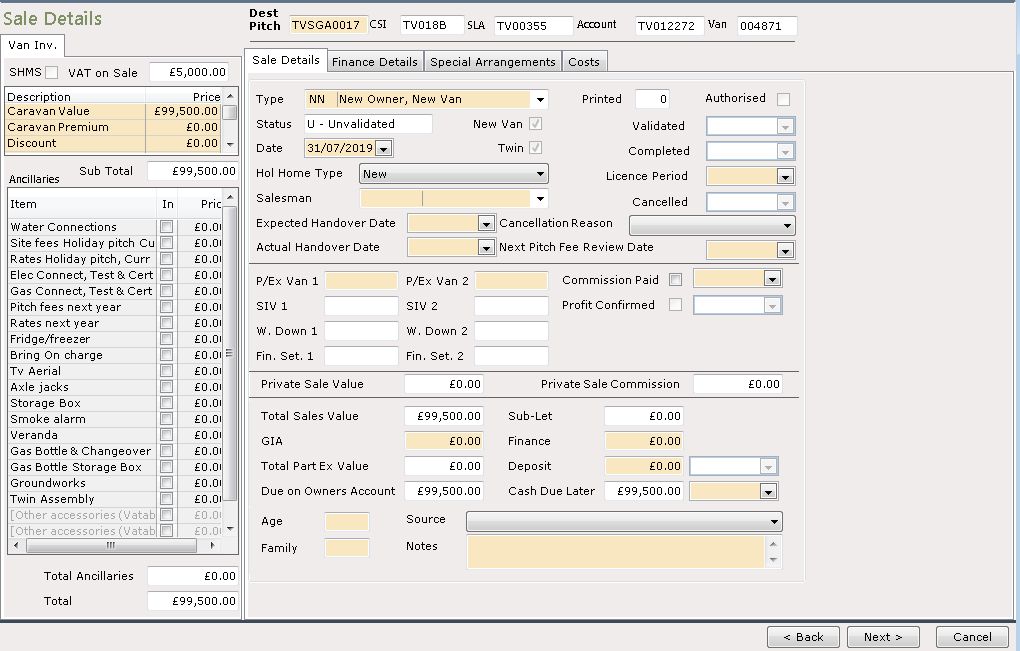

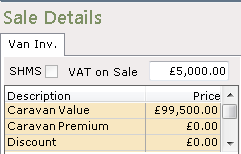
In the ‘Description’ field on the left-hand side of the screen enter the Caravan Value (the Sale Price), if not already showing, The VAT field figure is automatically calculated by the system. Enter/amend the ‘Ancillary Charges’ as appropriate, this can also be done via the ‘Costs’ tab at the top of the scree
If you used Priced Stock to price up the unit prior to sale, this information will populate automatically
Note this information will automatically populate if the van has been priced up already.
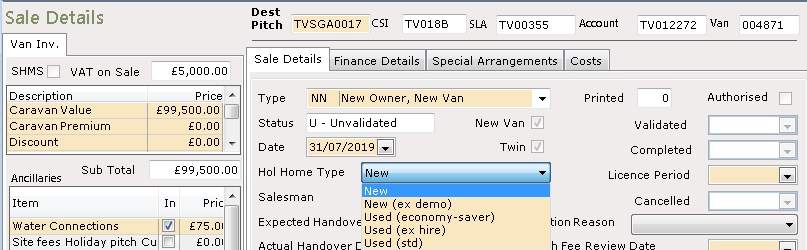
On the main area of this screen to the right of the pricing section check the details are correct for the ‘Type’ of unit, today’s date will be automatically entered, check that the ‘Hol Home Type’ correctly reflects the ‘Sale Type’, i.e. if the Sale Type is NN New Owner New Van then the ‘Hol’ field show ‘New’ for a New Van. If it is incorrect, use the drop-down arrow at the side of the ‘Hol Home Type’ field and select the correct Van description.
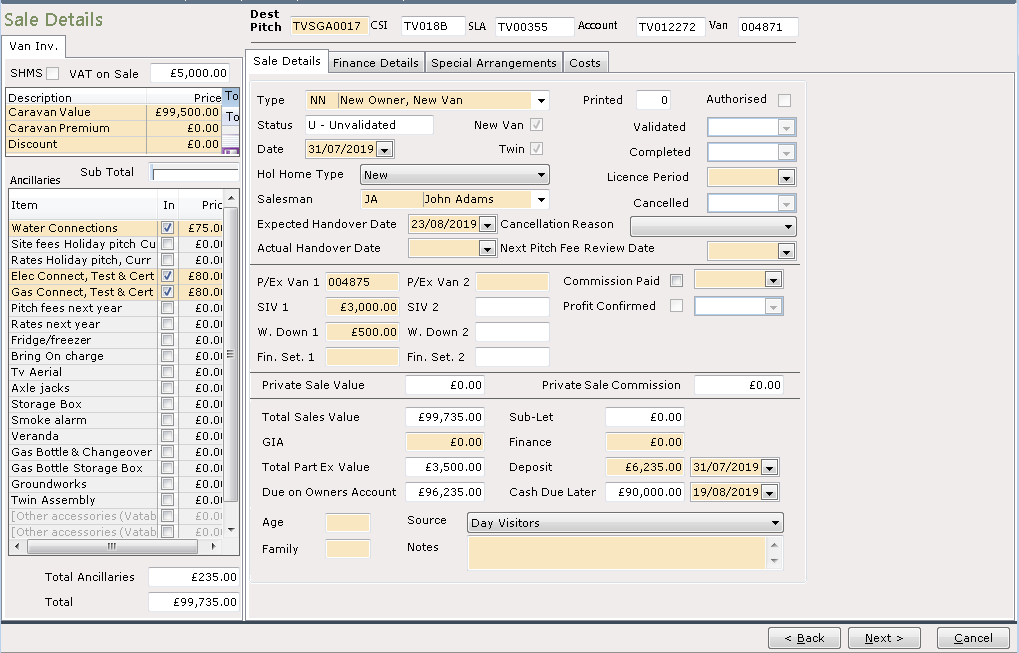
Add the Salespersons initials from the drop-down list at the side of the field
If the Salesperson isn’t showing in the drop-down list, ensure they have been added to the Salespeople Lookup for the Park the sale is at
The Sale Date will be automatically input, add ‘expected handover date’ using the drop-down Calendar at the side of the field.
In this type of Part Exchange, the CSN Number of the Customers Van created earlier must be manually entered in the ‘P/Ex1’ box. Once entered, click into another yellow highlighted field and the ‘SIV 1’ & ‘Write-down’ fields will activate. You should then enter the SIV and any Write Down Value for the Van that is being taken in as Part Exchange, these figures will calculate and appear in the section below which shows the Sale Value.

The total Sales Value will automatically input from the pricing section
Enter any GIA value if applicable. Enter any Finance value, if there is Finance on the sale you need to click the ‘Finance Details’ tab at the top of the screen and complete the required Finance details.
Enter the Deposit amount (needs to meet the Company’s P/X and Cash criteria)
Enter the ‘Cash due later’ date (Balance Due) using the drop-down Calendar in the field at the side
Enter a ‘Source’ from the dropdown list and complete the other information fields in this section if you wish.

Once all details are complete, click
If everything is correct the screen will move on, if red dots appear then further mandatory information is still required. Hovering your mouse over the dots will display information on what is required.
Click

The Destination Pitch’ message will be displayed
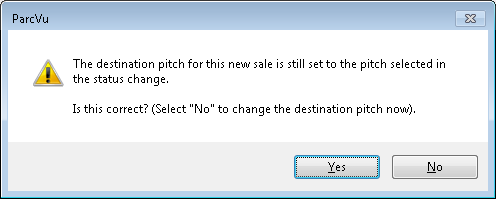
If this is correct click ‘Yes’ (If ‘No’ is selected the Sale Screen will be displayed with a red dot at the side of the ‘Destination Pitch’ field. Enter the required pitch number and then click ‘Next’)
This field is for information only, changing the Pitch Number will not automatically move the unit to the new Pitch
Click ‘Finish’ and the ‘Pitch Details’ screen will be displayed complete with Pitch Details/Account Details/Van Details/and Sale Details added for this sale.
From the Navigation list on the right-hand side of the screen select ‘View Sale Details’,
You will then be returned to the Sale Details screen, check over the Sale details. You can select to ‘View Profit’ at this point from the Navigation list on the right, to check the margin.
When you are satisfied that all is correct with the Sale Details, select ‘Print Invoice’ from the Navigation list on the right.
The Sales License Agreement will be displayed on the screen for you to check.
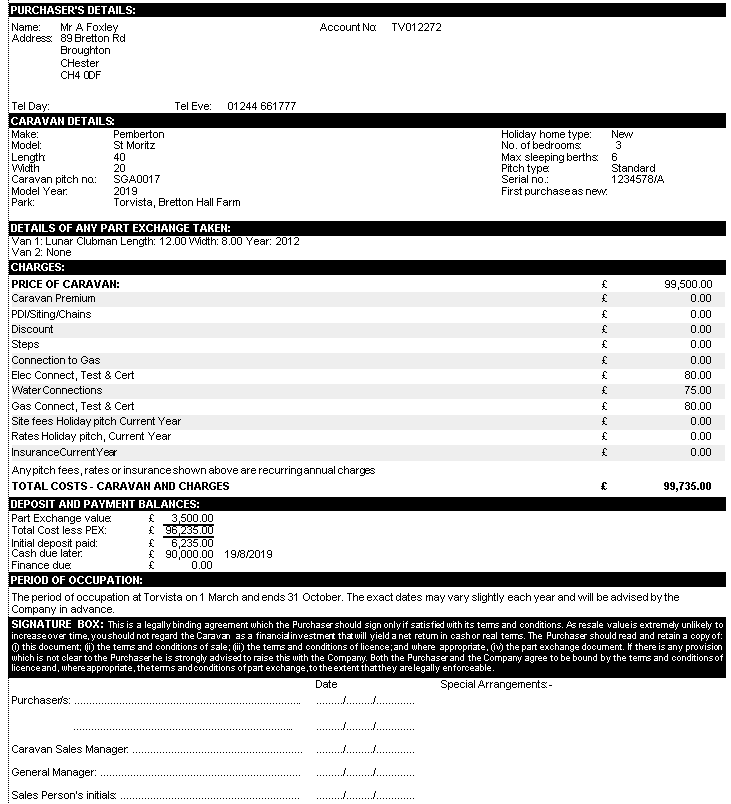
Click on the ‘Printer’ Icon (second one in) at the top left of the screen

Confirm the printer to send the SLA-Sales License Agreement to and click ‘Print’

Click on the Back Arrow at the top left of the screen to return to the ‘Sale Details’ screen.
The Sale is then finished and is in ‘Un-Validated’ and ‘Un-Authorised status
To amend any of the Sale Details, click ‘Edit’ from the Navigation list on the right-hand side of the screen and amend the information, click ‘Save’, check again and then select to ‘Print Invoice’ again if all is now OK.
The sale will now need to be ‘Authorised’ by the Park General Manager
(or other designated person), for it to proceed to the ‘Validate and Post’ stage, see ‘Authorise a Sale / Validate & Post / Complete a Sale
If the unit purchased was on a Sales ground Pitch, it will need to be Re-Pitched to the required Pitch once the Sale has Completed.
If the Sale does not proceed or Cancels for any reason, then the Van you created will need to be deleted from the system.
On Completion of a Part Exchange Sale, the Owners Old Van will go into ‘Limbo’ and a ‘Vat Costs’ row will be automatically added showing the new Van Cost from the Sale – this is the cost that will be used for VAT calculation the next time the Van is sold.
